Notice: Function _load_textdomain_just_in_time was called incorrectly. Translation loading for the wp-auto-republish domain was triggered too early. This is usually an indicator for some code in the plugin or theme running too early. Translations should be loaded at the init action or later. Please see Debugging in WordPress for more information. (This message was added in version 6.7.0.) in /www/reginaldchan_897/public/wp-includes/functions.php on line 6121
Archive – Page 23 – Reginald Chan

Category: Archive

  • What is Affiliate Marketing, Where to start and How to make money from it?

    What is Affiliate Marketing, Where to start and How to make money from it?

    When I published an article at Bivori on how I make around $400 per month just on affiliate marketing, many readers were asking if I could provide even more details on the said industry. I got to admit, affiliate marketing is a very lucrative industry … if you have not known about it yet.

    You have been warned. This tutorial is lengthy and thus, I would highly recommend you to bookmark this for future reference.

    Affiliate marketing for beginners consist of:

    • Introduction to affiliate marketing
    • What should you know about affiliate marketing?
    • How do you get paid?
    • Top affiliate networks you should participate
    • Recommended affiliate marketing etiquette

    Affiliate marketing for beginners – The what question

    Affiliate marketing is a process where you get a small token of appreciation (usually in terms of cash) when you recommend others to purchase the product. Affiliate marketing is very popular among bloggers as the commission could varies from a mere 5% to as much as 70% (or more) per sale while some companies are offering fixed commissions. Either way, it is a very lucrative industry when it comes to the term make money online.

    Personally, I consider affiliate marketers as virtual salesmen for the company and it is always a win-win situation for both sides. The supplier would be able to increase their sales with minimum (or zero) cost while the sellers are able to earn commission based on the number of sales.

    Pretty good deal if you ask me.

    Even before making your first dollar from affiliate marketing

    The most crucial part about affiliate marketing is all about:

    • Selling the right products
    • Selling to the right audience

    You may have the best product but if you have the wrong audience, no one is going to buy it from you.

    1. So, how do you choose the right products to promote?

    It all starts by deciding what niche you want to invest in. Choosing the right product will determine your success (or failure) in affiliate marketing.

    For example, there is absolutely no reason why you should be promoting products related to child care on a technology niche blog.

    While choosing the right niche is important, choosing the right products is also important too. There could possibly be hundreds of related products you can promote on a single niche topic. Therefore, you need to decide which would be the best product you should be promoting.

    When it comes to affiliate sales, lesser choices are always better and this means that instead of promoting two products on one write up, try promote only one.

    The reason is simple; The more choices you provide to your visitors, you are increasing the difficulties for them to decide. Your ultimate goal is to make sure that you make it simple for your visitors to decide and not making things harder and more complicated!

    2. Getting it to the right audience

    Finding the right audience group is important. Why? Imagine promoting an apple to a person who is looking for pears. You get the point.

    I personally use three tools to help me decide what my audience is looking for on my blog.

    1. Google Webmaster Tool > Search queries
    2. Alexa > Top keywords from search engines
    3. Google Analytics > Queries

    With the data extracted from the above tools, you would be able to determine which keywords that are attracting readers to your site and once that is done, head over to your favorite affiliate networks and search for the right product to promote.

    How to get paid after an affiliate sales?

    This is probably the most important thing for a blogger; getting paid. It is mandatory to have both of these if you want to grow in affiliate marketing:

    • PayPal
    • Payoneer

    1. PayPal

    The leading merchant when it comes to sending or accepting money. It works for all countries and it is possibly one of the best in its class. Click here to sign up for PayPal.

    2. Payoneer

    An alternative method to get paid when PayPal isn’t an option. It provides free account to all and you will automatically get a debit card as well. This is highly recommended by affiliate networks like ShareASale.

    Sign up for Payoneer and get $25 debited into your account for free!

    Help! Which affiliate networks should I join or participate?

    Top affiliate programs
    Puzzled over which affiliate network to join?

    Affiliate networks are basically ‘warehouses’ containing hundreds if not thousands of products you can promote. Choosing the right program to join is important as it will determine your affiliate success.

    A few rules which varies among these networks would be:

    1. Duration needed for you to receive a payout
    2. Cashout methods

    To answer the above question, here are my top contributors when it comes to affiliate sales:

    • ShareASale
    • Commission Junction
    • DigiResults
    • ClickBank
    • Amazon

    The below are the complete explanation for the various affiliate networks you can join and as well as the recommended affiliate programs to join.

    1. ShareASale affiliate network

    Fees: Free

    Minimum cash out: $50

    Payment method: Cheque, direct deposit and Payoneer

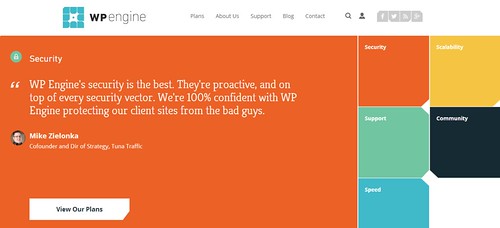
    This company started up since 2000 and had ever been expanding until now. With more than 13 years experience in handling various affiliate programs, this is definitely one of the best affiliate network in the market right now. It is also home to some of the biggest names in business such as StudioPress, Thesis and WP Engine.

    Sign up for a free ShareASale membership here – Join today!

    Signing up for ShareASale is free and they would do a quality check on your site before approving your membership. Once that is done, you are free to apply for any of the 3,900+ affiliate programs they have. Lastly, grab the links and you are ready to grab some sales.

    Top affiliate programs to join:

    The minimum cashout for ShareASale is $50 and it is done automatically. You can choose to be paid either by cheque or bank transfer via Payoneer.

    Also, ShareASale has several pay-per-click affiliate programs which is good for several blogging niche.

    Commission Junction affiliate network

    Fees: Free

    Minimum cash out: $50

    Payment method: Cheque, direct deposit and Payoneer

    Commission Junction is owned by ValueClick and is also one of those top affiliate networks for bloggers. You can literally find many blogger tools in Commission Junction or CJ in short such as HootSuite and MaxCDN.

    Recommended affiliate programs to join:

    Cash out on Commission Junction is automatic and you can adjust your payment method by clicking the Account tab.

    Join Commission Junction today and make money through affiliate sales!

    DigiResults Internet Marketing Network

    Fees: Free

    Minimum cash out: Nil

    Payment method: PayPal

    DigiResults is another popular affiliate network and most of the items are related to Internet Marketing. Choices of items to promote are rather lesser at DigiResults when compared to ShareASale or Commission Junction due to its specific niche.

    Top affiliate programs to participate:

    Cashing out at DigiResults is done automatically and you will get your affiliate payment between 30 or 60 days as stated by the merchant. Payment are done directly to your PayPal account from the merchant instead of DigiResults. Try DigiResults today!

    Note: I only use the above 3 affiliate programs as I had personal experience in them and 50% commission is huge.

    ClickBank Affiliate Program

    Fees: Free

    Minimum cash out: Nil

    Payment method: PayPal

    This brand is already a household name when it comes to affiliate marketing. ClickBank is used by thousands of affiliate marketers daily and it is highly reputed. At the moment, they are over 10,000 digital vendors and 100,000 affiliates using ClickBank.

    Top affiliate program to join:

    ClickBank doesn’t only offer products you can promote but as well as tutorials and guides to make you a better affiliate marketer. Join ClickBank today!

    Amazon Affiliate Program

    Fees: Free

    Minimum cash out: $10

    Payment method: Varies

    Among all the affiliate networks, Amazon is probably one of those who serve the shortest cookie period of 24 hours. Commissions are paid according to percentage and the number of items you sell. This means that the more you sell, the higher your commission which starts at 6%.

    While these may seem bad, do not underestimate the power of Amazon. The brand itself is already well known to many and there is absolutely no reason why you should not use it.

    There is no recommended products for Amazon as it has a huge inventory and all you need is to choose. Try Amazon Affiliate Program now!

    4 Online marketing strategies that always work for me

    Affiliate marketing for beginners
    Just like in military, you need proper planning before you can succeed in affiliate marketing

    There are many online marketing strategies which you can follow but for me, I only stick to one; sales funnel. My sales funnel is a 4 steps where I build a base for my readers to keep on reading. The chance of then exiting is really high and thus, each sentence should be phrased correctly.

    Here are the 4 basic steps you need to create a sales funnel:

    Step 1 [zero sales pitch] – What is the problem faced by your readers?

    Step 2 [slight sales pitch] – Provide at least 3 solutions to the above problem with one solution is buying a product

    Step 3 [moderate sales pitch] – Share a blog post on using the product to solve the problem (step to step guide or tutorial)

    Step 4 [high sales pitch] – Review of the product you are promoting

    I am not going to lie to you as the above is some seriously tedious jobs. However, it is extremely rewarding.

    As you can see above, each step would have a different tone when it comes to sale pitch. Starting off with a high sales pitch could easily deter your readers. Therefore, the best way is to create the ambiance gradually. Furthermore, I don’t think there’s any one who is wiling to fork out money in less than 10 seconds.

    Recommended affiliate marketing etiquette – What you should know?

    While seeing your money grow just by selling affiliate products could be very tempting, it is always best to practice with etiquette. For example, you would need to decide:

    • Source of promoting affiliate products such as via email or blog post
    • Accepting paid reviews
    • Promoting products which personal experience or otherwise

    There isn’t any cold and hard guidelines when it comes to affiliate marketing but you have to remember that it relates back to your brand and trust. Etiquette is really a thin line and it can be easily broken.

    Lastly, the most important practice an affiliate marketer should have is the share the real and proper information of the said product. Just don’t promote just because of the commission. Instead, promote because you know that it will help your readers … one way or another.

    Over to you

    So, I hope you enjoy this blog post as much as I do when writing and tell me what you think using the comment form below.

  • How To Become A Website Designer Without Coding Skills (And Still Make Money)

    How To Become A Website Designer Without Coding Skills (And Still Make Money)

    If one of your primary money making strategies is to serve more Google Adsense banners or affiliate marketing, stop. You could get more money from one piece of stellar monetization method than months of praying and playing the hoping game.

    Yes my friends, I am talking about becoming a website designer.

    Before you even think of giving up due to thousand and one reasons, at least hear me out and who knows, you might be smiling at the end of this article. So tell me if this post gives you the ‘ah-ha’ moment.

    Why is a website design important?

    A good website template will portray your business brand
    Website layout provide the first impression for your visitors

    You might not have notice the difference if you are running a small and leisure blog. However, it is very different when it comes to blogging for business. As a matter of fact, I had recently published an article on how the right business website template turned my leisure blog into a full-fledged business … which I highly recommend you to read it, 3 steps to design the best business website templates.

    In short, a website design portrays your professionalism and of course, you wouldn’t want to be an average Joe (and just like the other 60 million blogs out there).

    For professional bloggers, you would probably want to have your own brand and logo. A website design is one of your brand.

    Now, it you think that novice bloggers aren’t going serious with this, think again. I know many bloggers who are trying hard to build a great website design but many aren’t knowledgeable (coding works) like me.

    Lack of coding or CSS customization makes building a website theme sounds so impossible. And of course, don’t forget that hiring a web developer could cost you at least $1,000 for a really good theme.

    Do you see the opportunity here? Yes, the industry is still new and rather untapped by the big guns (yet). And I am not joking when I say that you can earn from a few hundred bucks to thousands of dollars as a web developer.

    So, what happens if you do not know coding skills? Sounds like the end of this dream?

    Not really … thanks to technology and a little passion.

    Making money as a website designer without coding knowledge

    How to become a web designer without coding skills?
    With the right tools, you do not need coding skills to build beautiful web templaets

    Yes you hear me right. The Internet is blooming and the market to find a good website designer is growing rapidly.

    So, the biggest question is how do you leverage from this phenomena?

    The goal here is to become a website designer without the knowledge of coding. As crazy as it might sound, this is very doable … and I done that before.

    Being a website designer is all about having good imagination and of course, knowledge in coding. Yes, basically two simple elements that can make or break your designing business!

    You need:

    • Truck load of ideas
    • The right developer’s tools

    How do you get the ideas rolling in endlessly?

    Ideas can be found anywhere especially with the help of the Internet
    Where does your ideas originated from?

    For me, this is probably the easiest part of all. Remember that Internet is your best friend. Scout around for the best header, navigation bars or even layout. Mix and match them to build the prefect web design.

    As easy as it sounds, you need to ensure that those ideas are workable. Keep in mind that you are copy-pasting ideas from around the web.

    Use these information you gathered to spark a new design.

    When I say copy-pasting, it doesn’t mean literally copy and paste. What I meant was use those ideas and modify them. Typically, I uses other website themes of other popular sites as a guideline or base for my template.

    This makes imagination on the ‘outcome’ … yes, much easier!

    Two resources that I use to get more designing ideas are:

    Bear in mind that the above are just examples. Feel free to mix and match anyway you like.

    The sky is your limit, my friends. Yup, that’s the beauty of running your own business.

    Related post: 6 methods to choose the best child themes

    Turning your ideas into beautiful website templates

    How to do you turn ideas into a work of art?
    What are the tools needed to turn your ideas into great website templates?

    By now, you should already have the ideas at the back of your head and the only thing that holds you back is the lack of CSS knowledge.

    I simply overcome it using two separate building tools which are:

    1. Dynamik Website Builder
    2. Genesis Extender

    In short, both of these tools help you to build a website template from scratch (literally) … without the need of coding.

    Want to change the fonts or probably increase the size of the navigation boxes? Both Dynamik Website Builder and Genesis Extender can do it for you using dropdown buttons.

    Of course, Dynamik Website Builder is a great choice when you are thinking of building a website template from scratch while Genesis Extender performs wonders by customizing the current Genesis child themes layout.

    The above two tools are just examples which proves that you doesn’t need any computer knowledge to build a stunning website design.

    As for the record, a friend of mine in Romania recently got himself Dynamik Website Builder and he turns his passion into a part time business … you, you guessed it right! Web designing.

    Recommended post: Building a WordPress theme with Dynamik Website Builder [Review]

    So, what if you know some coding knowledge?

    Okay, you probably have been blogging over 5 years now and could have some knowledge about CSS and those mind-blowing stuffs.

    If you are interested to test your knowledge on CSS, TIm Bonner had wrote a great article here; CSS for Beginners.

    Believe it or not, it is even easier for you to make money by designing websites!

    The trick here is easy. Find a nice website template that attracts you and grab the CSS style sheet. Now, you wouldn’t want to be ‘penalized’ or get reported on copyright stuffs and therefore, perform appropriate changes to the theme.

    It could be as easy as changing the theme colour, fonts and layout.

    Personally, make sure that you had changed ‘visibly’ enough before even selling the theme.

    I bet this sounds easy to you right? Again, bear in mind that many bloggers are already doing small changes to the current theme files and resell it out.

    You probably wouldn’t want to do that and never sell your themes if you half-baked it. Sell it as a whole package or don’t do it at all.

    Food for thought: Have you ever thought of becoming a web designer?

    Web designing is a very lucrative industry right now. If you are a blogger who is always trying to make a little more money, why don’t give this a try?

    It only cost you less than $100 to build and design any WordPress theme without any coding knowledge. All you ever need is either Dynamik Website Builder or Genesis Extender.

    If you are a web designer or have experience with this industry, do you mind sharing any tips with me and my readers? Use the comment form below and tell me what you think.

  • Want Blazing Fast Website Speed? Hello CloudFlare Page Rules

    Want Blazing Fast Website Speed? Hello CloudFlare Page Rules

    CloudFlare is the most popular Content Delivery Network (CDN) used by thousands of bloggers. CloudFlare makes it easy for you to integrate with nearly any CMS especially with WordPress and in most hosting environment resulted from CloudFlare partner’s program.

    While CloudFlare is easy to setup and could supercharge your site in less than 5 minutes (as advertised), you could produce even faster website load speed by using CloudFlare Page Rules … which I will explain in a moment time.

    BONUS: Best Web Hosting for Small Business

    What is Content Delivery Network or CDN?

    Content Delivery Network is a service which cache most of your static contents and store them on specific servers around the world. For your visitors, they will be noticed a much faster loading speed as these static files will be served to them from the closest location and for webmasters like you, you would be able to reduce your server loads.

    The CDN servers are highly optimized to provide only one purpose; which is serving your visitors with statis contents and fast … regardless which location they are from.

    For those who are wondering, static files are images (.jpg, .png, .gif), stylesheets (.css), scripts (.js) and many more.

    Why do you need CloudFlare page rules?

    CloudFlare page rules is for those speed junkies like me who wants to get more out of the free CloudFlare service. Basically, page rules allow you to specify which files you want CloudFlare to cache it on their servers. Of course, the more files they cache, the faster your website speed is and you would be able to save more server bandwidth.

    Page Rules is a powerful new set of tools that allows you to control how CloudFlare works on your site on a page-by-page basis. CloudFlare.

    CloudFlare page rules is so powerful that it can:

    1. Cache your whole site
    2. Allows you to setup different cache levels for specific pages
    3. Setup custom cache expiration

    While CloudFlare page rules can be godly, it can easily (literally) destroy your site with tons of 404 errors and slow updates. This wouldn’t really happen in this tutorial unless you are really pushing your luck.

    Most of us are using CloudFlare free account and you are entitle for 3 page rules plans free of charge. Anything more and you would need to sign up for CloudFlare pro or business plans.

    >> Not using CloudFlare yet? Sign up for a free account here! <<

    How to setup CloudFlare Page Rules?

    How to setup CloudFlare page rules
    What do you know about CloudFlare page rules?

    Configuring CloudFlare Page Rules is easy as long as you know which URL pattern to use. This means that very specific page rules settings are applied only to that specific URL’s only.

    So, what happens if you want to set a custom patterns for several strings of URL without using up all your page rule allotments?

    1. Understanding CloudFlare pattern matching URLs

    This is where Pattern Matching comes into play. It is a feature that allows you to create powerful dynamic custom patterns that can match a series of URLs instead of just one. The symbol used is the asterisk (*) character.

    example.com/* matches:

    • example.com/blog
    • example.com/directory

    But does not match:

    • blog.example.com

    *.example.com matches:

    • blog.example.com
    • www.example.com

    But does not match:

    • example.com

    2. Setting up CloudFlare Page Rules

    The first part is adding the relevant URL pattern which you can use from the chart above. Personally, I would advise setting up two specific URL patterns which are:

    • *example.com/*
    • *example.com/wp-admin/*

    In the first string of URL, this is where all the extreme caching takes place. The below are the settings for this specific page rule:

    • Custom caching – Cache everything
    • Edge cache expire TTL – Respect all existing headers
    • Browser cache expire TTL – 4 hours
    • Always online – Default
    • Apps – Optional
    • Smart errors – On
    • Performance – On
    • Rocket Loader – Default
    • Security – On

    Now, for the second string of URL, you would need to make a cache exception for your back-end (wp-admin area). Just follow the settings below:

    • Custom caching – Bypass cache
    • Browser cache expire TTL – 4 hours
    • Always online – Default
    • Apps – Optional
    • Smart errors – On
    • Performance – Off
    • Security – On

    These are some of the very basic and safe page rule settings that will speed up your blog loading speed and ensuring that you wouldn’t face any issue on your admin area. You may change any of these settings to fit your liking or requirements.

    Note:

    • Adjusting the duration of Edge cache expire TTL and Browser cache expire TTL are risky as you may face issues logging in or your visitors will not be able to see the latest post even though it is published

    Additional information:

    Edge cache expire TTL

    Sometimes cache headers are set on the server-side or by a CMS solution like WordPress. If you choose to Cache Everything, CloudFlare will respect these headers unless you choose to overwrite them. By overwriting the headers, CloudFlare will cache more content at the CloudFlare edge network, meaning a decrease in load to your server. To overwrite any default headers, choose a time from the drop-down menu. This is the refetch time for when CloudFlare checks the origin server for a new resource. Common situations where you may choose to overwrite any existing headers:

    • You are experiencing large surge in traffic
    • You are under DDOS attack
    • You are not sure what the headers on WordPress or your server are set to
    • You are using WordPress and want to easily overwrite the default settings

    Browser cache expire TTL

    This setting is how CloudFlare communicates with the visitor’s browser. CloudFlare will respect the headers that you give us from your web server, and then we will communicate with the browser based on the time selected in this drop down menu. For example, your origin server headers may be set to cache for 1 year. You could configure CloudFlare to respect those headers (this is done by default, unless specifically changed), and then choose a different time limit here like 24 hours. What this means is that if you ever had to change the resource over the course of the year, you could know with full confidence that all your visitors would have the new asset within 24 hours, without any additional load to your origin server.

    3. Clearing old caches on CloudFlare and WordPress

    By now, you should have two page rules setup for your blog. The last part would always be clearing your cache on both CloudFlare and on your blog. This is to ensure that the site is running on the latest cache version and updates.

    Once this is done, allow CloudFlare and your WordPress blog to build cache over time. If you are using W3 Total Cache, it could takes up to 48 hours while Super Cache could take around 6 hours or less.

    Help! CloudFlare Page Rules are not working!

    Here are two of the most common symptoms that the page rules are not working properly:

    • Unable to login to wp-admin
    • Newly published post is not visible even after clearing cache

    Through my experience, the biggest culprit for this could be the Edge cache expire settings. If you have set a very strict and long duration such as 24 hours, this means that CloudFlare will only check for new contents once every 24 hours. CloudFlare recommends a duration of 4 hours as the duration is more than enough for a normal (and average) blog site.

    At the same time, it is not recommended to have a shorter duration than what recommended as it could create a lot of resources strain on the hosting servers.

    Help! I am not seeing much improvement after enabling CloudFlare page rules

    This is extremely common if you have a lot of JavaScript and CSS files on your site. Another option is to use CloudFlare railgun which would cost you around $200 per month aka CloudFlare Business plan. If you are running a high traffic website, I would highly recommend this as railgun technology will make your website blazing fast.

    The cheaper and more affordable alternative is using MaxCDN and it only cost you $67.50 per year (with MaxCDN coupon checkout25). For your information, you can integrate MaxCDN with CloudFlare to boost your website speed. MaxCDN is a great tool for bloggers when it comes to serving static contents while CloudFlare ensures that your site is packed with bulletproof security.

    >> Try MaxCDN today and get 25% discount off your total bill! <<

    Does your website takes more than 2 seconds to load?

    If the answer is yes, you certainly got to try the free CDN solution which is CloudFlare. If you are having around 1,000 traffic and below, CloudFlare would be more than sufficient when it comes to make your website blazing fast. With so many hosting companies already partnering up with it, I see absolutely no reasons why you shouldn’t!

    Tell me what you think using the comment form below and if you like the article, I would appreciate a social share!

  • Scrape The Best High PageRank Blog Sites Using ScrapeBox

    Scrape The Best High PageRank Blog Sites Using ScrapeBox

    ScrapeBox or SB in short is already a household name and often considered the Swiss army knife for any black hat SEO campaigns. ScrapeBox is a powerful SEO tool that you can build thousands of links, comments or even scraping articles on the Internet within 5 minutes or less.

    While ScrapeBox is very common on the darker side of the world, it is also a very popular tool for white hat SEO. Even Neil Patel had a guide on how to use ScrapeBox which you can find it here, Quick Sprout.

    This tutorial is all about using ScrapeBox and transforming it from a famous black hat SEO tool into a crazy, devastating and powerful white hat SEO builder. These are some of the very powerful SEO techniques which can either boost your website ranking multiple times (if done correctly) or totally destroy it. You have been warned!

    This article is long and thus, I would recommend you to bookmark this for future reference.

    [Tutorial] Get high PageRank sites using ScrapeBox

    I use ScrapeBox to find high PR blogs which I could leave comments or even applying for guest posting opportunities. Instead of spending the whole afternoon (just assuming) or probably days manually finding quality blog sites with Google or CommentLuv search, ScrapeBox can basically automate the whole process in just a few minutes ‘¦ literally.

    ScrapeBox is an excellent tool when it comes to off page SEO.

    What is ScrapeBox?

    ScrapeBox costs $97 for one lifetime license and if you have more than one computer, you would need to get more licenses. You may contact ScrapeBox support if you would need to purchase additional licenses and at times, you may get a discount from it.

    >> Get ScrapeBox here! <<

    Using shared or private proxies

    If you are thinking of using ScrapeBox, you need to run on proxies. This is to avoid your IP(s) being blocked by Google. Since ScrapeBox does the process a thousand times faster than human, it is a no brainer to use proxies to avoid Google detection and penalization. To run ScrapeBox functions properly, you would require at least 10 proxies.

    You have been warned. You can use ScrapeBox without proxies but your IP will be banned by Google within days. Tested and proven!

    There are two types of proxies which you can use with ScrapeBox which are shared or private proxies. Shared means that that proxy could be shared among 3 to 10 users while private proxies are specific to you only. If you are looking for good proxy company, I would highly recommend Squid Proxies. They have top notch customer service and they assist to setup proxies within an hour or less. I got mine within 5 minutes after completing the checkout and it only cost around $1 per private proxy.

    >> Click here to get Squid Proxies as low as $0.42 each! <<

    I am going to be very honest with you; ScapeBox is not very user-friendly and it would require a little learning curve before you can put it to good use. But don’t frust! This I will be creating more tutorials on how to use ScapeBox and you should bookmark it for future reference.

    Scraping keywords

    Finding high PageRank sites is a 3-steps process when you are using ScapeBox and the first is to find the proper keywords. While you can use keyword research tools such as Google Keyword Planner or Long Tail Keyword, ScrapeBox has an inbuilt keyword scrapper feature.

    ScrapeBox makes keyword scraping as easy as A, B and C. Each process takes less than 5 minutes to perform which is a huge time saver for marketers and niche bloggers.

    Step 1 – Scraping related keywords

    • We all heard about long tail keywords and the effectiveness of it. The same concept applies when you are using ScapeBox. You want to find both exact keywords and related keywords to maximize your search results.
    • Click on Scrape and select Keyword Scraper.
    • This will opens up a box that has two columns. Key in your keyword on the left column and select Scrape.
    • A list will related keywords will show on the right column and delete those which are unrelated.
    • [Optional] Click on Transfer Left and repeat the first process. Delete off those keywords which are unrelated and you would be able to get a complete list of keywords on your right column.
    • Click Send to ScrapeBox and press Close.

    Scrapebox keyword scrapper tool

    Note: Scraping the related keyword twice would provide you a better and bigger list of related keywords which is highly recommended to improve your search results later.

    Step 2 – Choosing the right footprint

    Footprint is also known as command and this is how to control ScrapeBox to perform a specific task. By default, ScrapeBox comes with several basic footprints which you can use. In this tutorial, you do not need to use any. Instead, I will show you how you can build your own footprint.

    In the Harvester column, key in either one of these codes:

    • site:.com (you may replace .com with .net, .org, .info etc)
    • intitle:keyword
    • inurl:keyword
    • intext:keyword

    For example, using ‘site:.com’ will enable ScrapeBox to search for sites which has the specific keyword and the URL comes from dot coms only.

    Fill the relevant footprint and then, click on Platform. There is a full list of platforms you can choose from but I always go with WordPress only.

    Now, you are ready for the next step.

    Scrapebox recommended footprints and platforms

    Step 3 – Setting up proxies

    The list of keywords will be visible in the Keywords column and now, you need to set up proxies. If you have yet to get any proxies, you can get some cheap but quality proxies from Squid Hosting.

    • Enable Use Proxies.
    • Paste your proxies in the Select Engines & Proxies and click Manage.
    • A box will open up and your proxies will be visible in it.
    • Click on Test Proxies and select Test All Proxies. This is to ensure that all your proxies are working properly. Status of the proxies must be in green which is good while red means the proxies are down. Contact your proxy supplier if you find any of those proxies which are not working and they will provide you with new ones.
    • Press Close.
    • Note: You may select the type of search engine to use and I highly recommend Google, Yahoo and Bing only.  As for the number of results, I usually set it to 150 as anything more than that usually provides low quality results.

    Setting up proxies for ScrapeBox

    Step 4 – Harvesting URL’s with ScrapeBox and find high PageRank sites

    This is where ScrapeBox will do its magic. Select Start Harvesting and ScrapeBox will automatically search for related blog sites which the keywords you selected.

    Depending how fast your computer, proxies and Internet speed are, it will generate a list of blog URL’s which you can start working on. While ScrapeBox would probably return thousands of results, it is time to trim down those links.

    The process of trimming down the links is to find high PageRank sites only.

    This is how you trim your URL results:

    • Select Remove / Filter and select Remove Duplicate URL’s
    • [Optional] You can further trim down the links by using either selecting Remove URL’s Containing or Remove URL’s Not Containing.
    • Select Check PageRank and Get Domain PageRank

    Checking of PageRank would take some time and therefore, leave ScrapeBox running. Once the results are out, you can either export it out using excel using Export URL List and select Export as Excel (.xlsx) or the lazy way (my style) which is to click on the PR button to sort it automatically.

    Find high PageRank sites using ScrapeBox

    Now, you have completed the whole scraping process and you should have a list of quality sites you can start commenting, request for guest posting, communicate with the webmasters in terms authority building etc.

    ScrapeBox is a dangerous SEO tool. You have been warned!

    While SB could do wonders for your SEO campaigns, it is also a very dangerous tool which can kill your blog ranking overnight. For starters, I do not suggest using it directly on your blog. Instead, you could try to use it on your secondary sites to start building backlinks.

    Wait! Do you like this tutorial? I would really appreciate if you can share this article for me using the social icons below.

  • Comparing Synthesis And WP Engine With Zero BS Review

    Comparing Synthesis And WP Engine With Zero BS Review

    When it comes to choosing the best managed WordPress hosting, nothing come close to both WP Engine and Synthesis by CopyBlogger. With both the hosting offering top-notch services and tons of juicy bits to boost your website speed, I know how hard it is to decide.

    This site has been running on both Synthesis hosting and WP Engine for sometime now and thus, I believe that I am in a very good position to share my view points on both the WordPress hosting. Yes, there will be no cover ups and no bias in this write up which I hope this will benefit those who are deciding to get either WP Engine or Synthesis web hosting.

    Synthesis web hosting by CopyBlogger

    Synthesis web hosting review
    Synthesis is often considered all-in-one package for managed WordPress hosting; performance and pricing under one roof

    Synthesis is managed by the team behind the popular, Genesis Framework and child themes. Since I am a huge fan of Genesis, Synthesis was the first managed WordPress hosting for me. With CopyBlogger’s industry standards, all hosting plans come with a full 30-days money back guarantee and you can cancel anytime without any questions.

    The lowest plan starts at $27 per month to have your WordPress site hosted on Synthesis and each plan comes with Scribe SEO and W3 Total Cache Pro (will explain in a minute). The current Synthesis discount is 10% of the total bill if you decided to pay quarterly.

    1. Why is Scribe SEO good?

    This is a pretty cool SEO tool for those who are serious in SEO. For your info, I have long been using Scribe SEO and having this SEO tool incorporated into my hosting plan is definitely a dream come true. Read more on Scribe SEO here.

    2. The real deal about W3 Total Cache Pro

    w3TC Pro is a premium service which is great because it provides Fragment Cache feature. This is a feature exclusively for Genesis Framework users only and it basically turbocharge your website performance between 30 – 60%. Source.

    3. Site Sensor and Sucuri scanning

    All Synthesis hosting plans comes with Site Sensor which will automatically scans your site to ensure that your site is up 24/7. A simple downtime and you will automatically get an email notification on that.

    And now you ask … how cool is that?

    Sucuri is also a great addon as it will automatically scan your WordPress website(s) once every 6 hours. This doesn’t only help build a safer website but as well as you know that your site is in good hands.

    Synthesis Hosting Plans

    Starter plan:

    • $27 per month
    • 1 WordPress install
    • Shared memory
    • 3GB storage space
    • 50GB Monthly bandwidth
    • 2,500 daily traffic

    Professional plan:

    • $97 per month
    • 2 to 4 WordPress installs
    • 2GB memory
    • 40GB storage space
    • 650GB monthly bandwitdh
    • 20,000 daily traffic

    Advanced plan:

    • $147 per month
    • More than 5 WordPress installs
    • 4GB memory space
    • 80GB storage space
    • 1.5TB monthly bandwidth
    • 85,000 daily traffic

    Enterprise plan:

    • $300 per month
    • More than 5 WordPress installs
    • 5GB memory space
    • 160GB storage space
    • 3.0TB monthly bandwidth
    • 300,000 daily traffic

    WP Engine – The most popular managed WordPress hosting

    WP Engine hosting review
    WP Engine offers scalability and top-notch performance … plus bulletproof security features

    When you talk about managed WordPress hosting and WP Engine could be the most mentioned hosting on search engines.

    So, what is WP Engine?

    At the first look, WP Engine certainly looks more superior than others in terms of WordPress premium hosting. WP Engine promises superior WordPress hosting and on top of that, 60 days money back guarantee.

    Not convinced enough?

    Nearly all WP Engine staffs know their ‘thing’ when it comes to WordPress and hosting. This means that you could be talking to the billing team and still ask them for WordPress guidance.

    WP Engine offers EverCache Technology, scalable hosting service, free restoration of website if you ever get hacked and of course, the all-time-famous Staging Area. If these sounds weird to you, the below are the explanations.

    1. EverCache Technology

    Worry not about cache plugins when you hosted at WP Engine. With EverCache technology, WP Engine does all the caching for you and this means good bye W3 Total Cache and Super Cache plugins. Source.

    2. Scalable hosting services

    If you are ever worried that your site might go down due to high traffic, WP Engine could be your choice. WP Engine hosting environment is very scalable where your site does not goes down even if the traffic is hitting the roof.

    3. Top notch security and hacked sites

    When you are using WP Engine to host your blog, you do not need to worry about being hacked. However, just assume that if your site (ever) got hacked, WP Engine will restore it for you … for free. Period.

    4. Staging area

    This is the only hosting provider that provides a staging area for clients. For example, you can deploy new pages, themes, plugins or widgets without worrying about your site crashing down. Once you are happy with the changes done, you can easily copy the staging area to your live site with just a click of a button.

    5. International datacenters

    For all WP Engine clients, you are able to select one out of three international datacenters to host your files; United States, United Kingdom or Japan. This means that your website will load faster for your visitors … regardless where they are!

    WP Engine Hosting Plans

    Personal plan:

    • $29 per month
    • 1 WordPress install
    • 25,000 visits per month
    • Unlimited data transfer
    • 10GB local storage

    Professional plan:

    • $99 per month
    • 10 WordPress installs
    • CDN service (NetDNA) included
    • 100,000 visits per month
    • Unlimited data transfer
    • 20GB local storage

    Business plan:

    • $249 per month
    • 25 WordPress installs
    • CDN service (NetDNA) included
    • 400,000 visits per month
    • Unlimited data transfer
    • 30GB local storage

    Premium plan:

    • Price based on negotiation
    • Unlimited WordPress installs
    • CDN service (NetDNA) included
    • Millions of visits per month
    • Data transfer by volume
    • Unlimited storage space

    Comparing WP Engine vs Synthesis hosting

    With the above comparison, you can easily see that both Synthesis and WP Engine are basically on par with each offering something more ‘unique’ than another. To make things easier, here are a few of the important decision making factors:

    1. The amount of traffic

    Allow me to be very clear on this. Synthesis is offering 2,500 daily traffic and WP Engine is 25,000 visits per month. A simple calculation will show that the Synthesis is offering 75,000 traffic monthly which is the clear winner here.

    One thing you should consider about WP Engine is that the visit counts are calculated based on interactions; This means that human visits and bot / crawlers are both calculated into the visit counts. For those taking WP Engine starter plan, make sure you perform a quick calculation to ensure that you will not go over your plan. If you ever go over your plan, you will be charged $1 for every 1,000 traffic at WP Engine.

    Winner – Synthesis

    2. Web hosting features

    Web hosting features is one of the biggest factors that distinguish both the web hosting. For starters, Synthesis dashboard is very simple and while WP Engine offers a much detailed one.

    Synthesis Web Hosting dashboard
    Synthesis dashboard is clean and simple
    WP Engine Dashboard
    WP Engine dashboard is filled with more lots of data and latest WP Engine news


    WP Engine’s selling point is rather different compared to Synthesis. At WP Engine, they promise top-notch hosting and excellent cache system. As a matter of fact, what attracted me the most about WP Engine hosting are the EverCache technology and the staging feature. Staging feature is a great tool especially if you are constantly changing your theme while EverCache is a great advantage for those who are looking for a fast and scalable web hosting.

    Synthesis offers Scribe SEO and W3TC Pro (fragment cache) which are extremely great for both website loading speed and SEO ranking. Comparing the lowest hosting plans, Synthesis offers pretty much everything out of the box for both beginner and professional blogger. The biggest advantage using Synthesis is that it offers Site Sensor and Sucuri scanning which are great for security. I love to consider Synthesis as a all-in-one package for performance, SEO and security. While Synthesis doesn’t have staging area, it offers clients to backup their site using Database Snapshot. Basically, this is one great ‘one button’ backup feature for Synthesis.

    Winner – Draw

    3. Web hosting support

    When it comes to support, both are pretty impressive and I totally dig into them. With over 8 years experience in customer service, I am really a hard customer to please.

    Personally, both support teams are equally good but WP Engine has an edge over Synthesis with the Live Chat feature. With that, you are able to address your issues to a support agent immediately without needing to pull a hair. Synthesis support works on emails only and when it comes to problem solving, I believe live support is always the best solution.

    On average, it would take about 30 minutes to an hour for WP Engine staffs to reply to my tickets while at Synthesis, it would take around 1 to 3 hours to have an email reply. Therefore, WP Engine is slightly superior over Synthesis when it comes to response time.

    Winner – WP Engine

    4. Website loading speed

    Both WP Engine and Synthesis offers below 1.5 seconds loading on a highly optimized theme. I noticed that WP Engine is loading about 0.05 to 0.1 seconds faster than Synthesis. With the small variance of under 0.1 second, I don’t think it is worth to judge. This is a definite tie as both offers blazing fast speed.

    Just to add, WP Engine is powered by EverCache technology while Synthesis is working closely with W3 Edge team on W3 Total Cache Pro version.

    Winner – Draw

    5. Ease of setup and migration service

    Setting up and migrating from one hosting to another is relatively easy with both of these hosting companies. For those who have limited expertise, you can find a team of migration companies at your service recommended by both WP Engine and Synthesis.

    Migrating to Synthesis is done by Fantasktic at $99 per migration while WP Engine has a truck load of companies offering migration service at an affordable price. If you are tight in budget, you can easily opt for my WP Engine self-migration guide or the step by step tutorials are available on the main website.

    Winner – Draw

    6. Best value for money hosting

    Synthesis is offering 10% discount on the quarterly bill while WP Engine is offering 2 months free (by default) when you sign up for a yearly plan. WP Engine is definitely a better value for money in terms of discount as 2 months free provides more saving than the 10% flat discount. Furthermore, WP Engine has limited time offers from time to time. For example, they are offering 4 months free hosting in conjunction with Cyber Monday 2013.

    However, Synthesis has something under its sleeves too. Synthesis has Scribe SEO, W3 Total Cache Pro, Site Sensor and Sucuri scanning where they packed quite a value into the hosting plans.

    However in terms of forking out your own money, the constant discount provided by WP Engine proves to save me slightly more money compared to Synthesis.

    Winner – WP Engine

    My decision – Synthesis vs WP Engine hosting

    For me, this is a tough call to decide. I knew I have to decide and I ended up with WP Engine Professional hosting at $99 per month. With CDN service inclusive, I knew this is probably the best choice for me to go with.

    I had in fact, fallen in love with WP Engine staging area feature and it is a must for any bloggers who customize their sites. Everything can be done easily without worry and I have absolutely nothing to worry about crashing my site anymore.

    Here’s what I think.

    WP Engine is expensive but you are definitely paying more than just service. Ask the support staffs on anything and they basically sort it out for you. If you think that you need help with codes, they do it for you too … for free! That’s what WP Engine is all about.

    If you are looking for a managed WordPress hosting with affordable price, Synthesis is definitely a good price. For starters, they are already selling cheaper than WP Engine. Don’t forget that with Synthesis web hosting is configured accordingly to make Genesis powered sites running blazing fast. This is definitely a great deal for your money.

    60 days money back guarantee >> Try WP Engine and get 30% off hosting today!

    WP Engine HappyNewHost14 Special Offer

    The final decision has to be based based on your own requirements. Basically, if you are a developer who needs a lot of ‘space’ for modifications and testing, WP Engine is definitely the best bet for your money with the almighty staging area. If you are looking for more visitors but a lower price hosting package, Synthesis could be a better choice.

    30 days money back guarantee >> Try Synthesis and get 10% off your quarterly bill!

    Don’t take my word for it though as my web hosting expectations might not the same with yours. When it comes to deciding between WP Engine or Synthesis, it is best if you put serious consideration on traffic, performance and features.

    Oh wait! If you can’t decide, both hosting comes with money back guarantee (trial period) and thus, you have nothing to lose!

    So, which web hosting will best fit you? Tell me using the comment form below!

  • 2013 Black Friday Sales And Cyber Monday Deals

    2013 Black Friday Sales And Cyber Monday Deals

    Are you saving up money to buy that certain thing for your blog such as website hosting or premium WordPress themes that you have been eyeing for sometime now? Black Friday sales and Cyber Monday deals are just around the corner and these are great times (for shopping) that you just can’t miss plus, excellent way to get the things you want and not burning a bigger hole in your wallet.

    Be sure to bookmark this page to keep up to date on the best deals for bloggers!

    The following are some of the current and upcoming 2013 Black Friday sales and Cyber Monday deals I had came acrossed. If you have anything promotion in mind that would benefit bloggers, feel free to contact me!

    Black Friday And Cyber Monday 2013 Deals

    Managed WordPress web hosting

    When it comes to WordPress hosting, I believe nothing can come close to WP Engine. WP Engine is currently offering Special Black Friday – Cyber Monday with a special limited time offer which will end by 2nd December 2013. The deals consist of:

    • Buy WP Engine personal hosting plan with one year prepaid plan and get 4 months of free hosting worth $116 – Total saving $116.00
    • Need a bigger hosting plan? Try WP Engine professional hosting annual plan and get 4 months free hosting worth $396 and unlimited NetDNA CDN usage ($108 value) – Total saving $504
    • Looking for a business hosting instead? Get WP Engine business annual plan and get 4 months free hosting worth $996 and unlimited NetDNA CDN usage ($108 value) – Total saving $1104

    *NetDNA Content Network Delivery services is a part of MaxCDN.

    Click here >>> Yes! Let me try WP Engine for 60 days and worry free! <<<

    Remember to use the coupon code “cyberhostspecial13” upon check out to enjoy the special offer.


    Web hosting deals for Black Friday and Cyber Monday

    1. GreenGeek

    I came across GreenGeek hosting 3 months back and from that time onwards, I always suggest GreenGeeks hosting for those who are looking for affordable and most importantly, green hosting. The hosting servers are located in the United States and is currently hosting over 100,000 websites.

    The offer below only last from now until 2nd December 2013 and so, grab yours today!

    2. HostGator

    Just like any other hosting companies, HostGator is also having their sale and for me, it is an excellent deal indeed. I have personally been using HostGator since 2009 and never been happier. Great support, service and value for money packages. Here are the deals they are offering for Black Friday and Cyber Monday 2013:

    • 60% off hosting (starting at $1.98 per month)
    • $4.50 per domains for .COM/NET/ORG/INFO/BIZ
    • Discounted price for hosting packages including Shared, Reseller, VPS and Dedicated Servers

    There is no coupons available for the above as they will be automated. This means that respective coupon codes will be available to you upon check out. All you need is to click here >> Try HostGator today!

    Need additional discount? Use these HostGator discount codes for more savings!

    • Reginald25‘ for additional 25% discount
    • Reginald994‘ for additional $9.94 discount

    Bonus: Reginald’s Cyper Discount on website hosting packages

    Okay, so WP Engine is not your type of you prefer something else. How about trying DreamHost? DreamHost has over 16 years of web hosting experience and the brand is already a household name for many.

    Currently, there is no Black Friday or Cyber Monday deals provided by DreamHost but I thought why not throwing in extra $50 discount on your purchase right? All you need to do is to coupon code ‘CYBERDEAL60‘ and you will automatically entitle for the discount.

    Click here >>> Try DreamHost today and save $60! <<<

    Domain name discounts

    NameCheap – NameCheap is one of the cheapest and most affordable domain name registrar I ever came across. Users are entitle for free WHOIS protections and many other freebies upon sign up. Here are the current deals for NameCheap:

    To entitle for NameCheap discount, all you need is to click on the respective links and use the coupon codes on the checkout page. Or, just hit the link below:

    Click here >>Grab NameCheap discount <<

    Like these discounts? Remember to share these Black Friday Sales and Cyber Monday Deals with your friend using the social media button below!