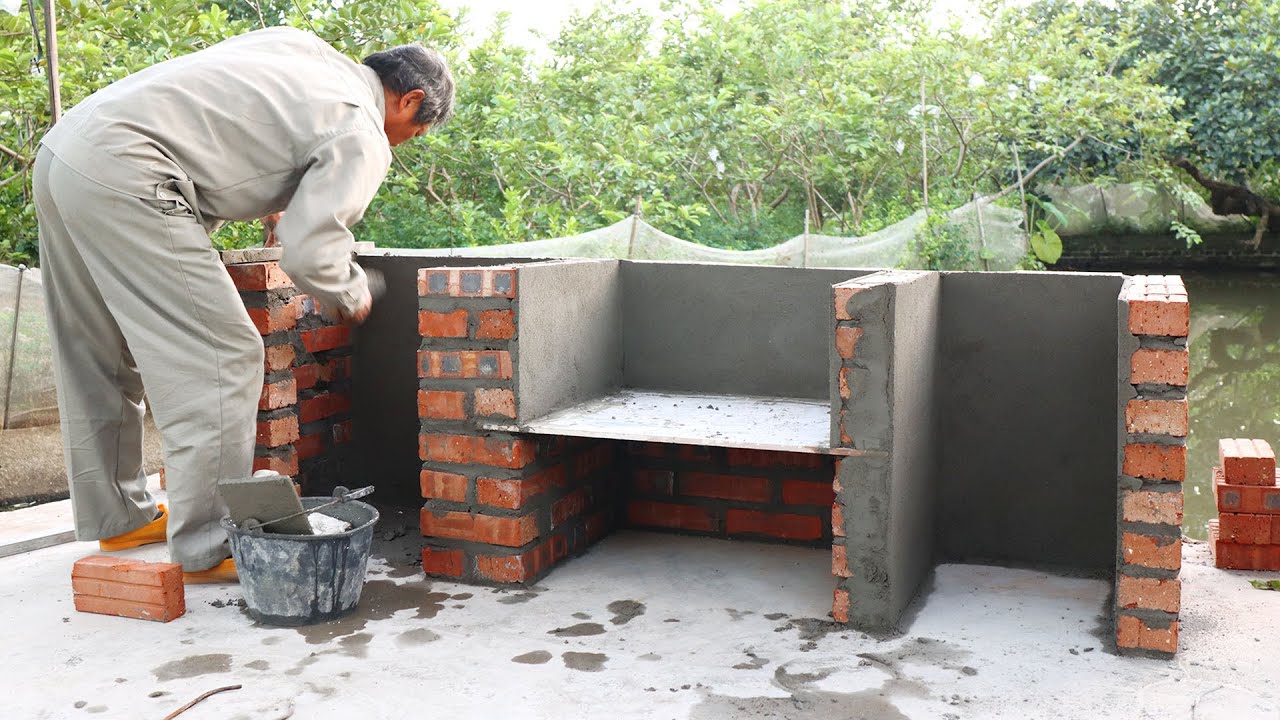
Transform your outdoor space into a culinary haven with a handmade brick barbecue. This detailed guide provides step-by-step instructions for creating a durable and stylish brick barbecue with a smoker. Perfect for both beginners and experienced DIY enthusiasts, you’ll learn how to lay bricks with precision, integrate custom metalwork, and fine-tune ventilation for the ideal cooking experience.
Preparation and Foundation
Below is a comprehensive list of materials needed to build a brick barbecue with a smoker. This list ensures you have everything required from the start, making the construction process smoother.
Foundation and Structure
- Concrete Mix: For creating a solid foundation.
- Rebar: To reinforce the concrete foundation.
- Bricks: A combination of standard bricks for the main structure and red bricks for aesthetic detailing.
- Firebricks: Specifically for areas that will be exposed to high heat, such as the smoker.
- Metal Lintel: For supporting the structure over the firebox opening.
Mortar and Adhesives
- Mortar Mix: For bonding bricks together.
- Fireproof Mortar: For areas around the smoker and fire pit, to withstand high temperatures.
Metal Work for Cooking
- Steel Drum: For creating a customizable smoker (optional, based on design).
- Heavy-Duty Grill Racks: To fit the dimensions of your barbecue.
- Metal Grates for the Smoker: Custom-fit for smoking meats.
- Car Jacks: For an adjustable grill height system (optional).
- Sheet Metal: For creating doors or covers for the smoker and fire pit.
- Metal Hinges: For any doors on the smoker or fire pit.
Finishing and Detailing
- Heat-Resistant Paint: To coat any exposed metal parts, enhancing durability and resistance to weather.
- Brick Ties: To fasten the grill to the foundation or adjacent structures for added stability.
Tools and Equipment
- Trowel: For applying mortar between bricks.
- Spirit Level: To ensure each course of bricks is level.
- Mason’s Hammer: For shaping or trimming bricks as needed.
- Concrete Mixer: For mixing large quantities of concrete more efficiently (optional).
- Wheelbarrow: For transporting mixed concrete and other materials.
- Shovel: For mixing mortar and concrete by hand and transferring materials.
- Measuring Tape: For precise measurements throughout the project.
- Rubber Mallet: For gently adjusting bricks without cracking them.
- Grout Bag: For more precise mortar application in tight spaces.
- Concrete Float: For smoothing out the concrete foundation.
- Welding Equipment: If custom metalwork is required and you’re doing it yourself.
Ventilation and Control
- Metal Dampers: For controlling airflow in the smoker and grill.
Before you begin your project, it’s essential to review the list and tailor it to your specific design, especially if you’re planning any custom features. Having all your materials and tools ready will streamline the building process and help ensure a smooth and enjoyable construction experience.
Step by Step Guide in Building Your First brick Barbecue
Step 1: Planning Your Foundation
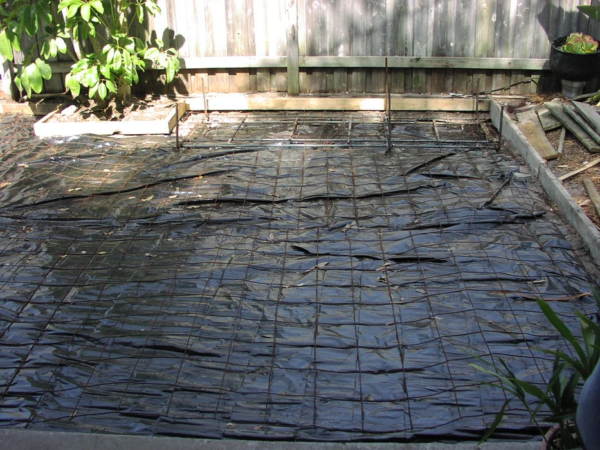
Before you mix your concrete, carefully plan the dimensions of your foundation. The size should accommodate your barbecue and provide stability. Consider the location carefully, ensuring it’s convenient and safe for use.
Step 2: Mixing and Pouring Concrete
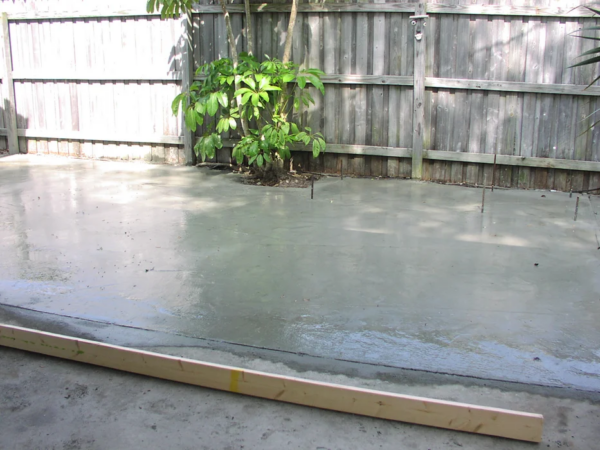
Mix your concrete following manufacturer instructions and pour it into a framed area. Ensure the surface is level as this will be the base on which your barbecue will stand.
Step 3: Adding Reinforcement
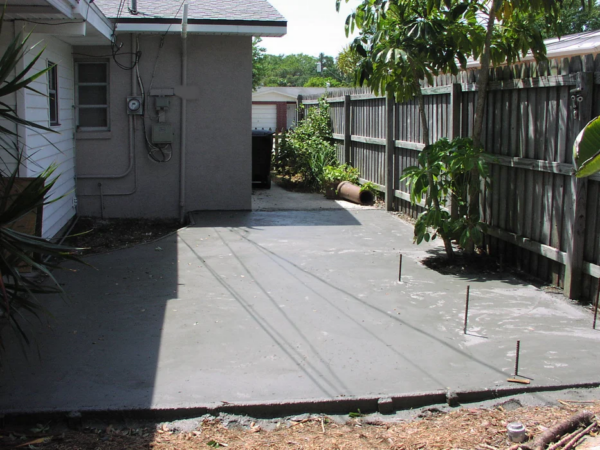
While the concrete is still wet, insert rebar strategically into the mix. This will reinforce the strength of your foundation, crucial for supporting the weight of the bricks.
Building the Base Structure
Step 4: Laying the First Course of Bricks
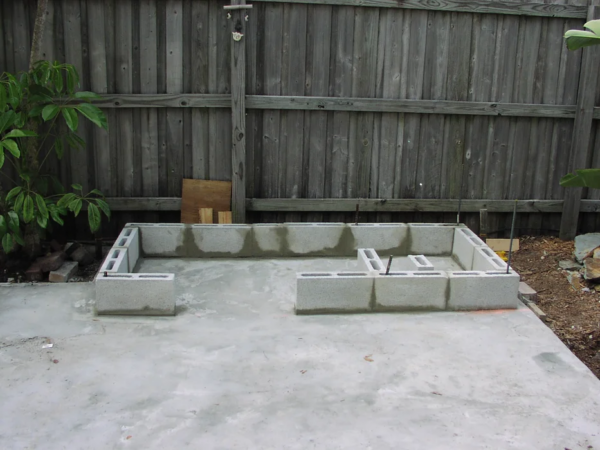
Begin by laying the first course of bricks on your solid foundation. Ensure they’re level and evenly spaced, using a mortar mix to secure them in place.
Step 5: Second Course of Bricks
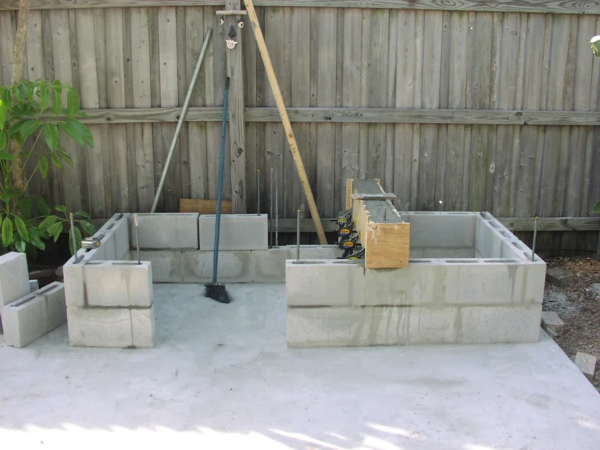
For the second course, stagger the bricks over the joints of the first course to ensure a sturdy build. Apply mortar between the bricks for a strong bond.
Step 6: Continuing with Subsequent Courses
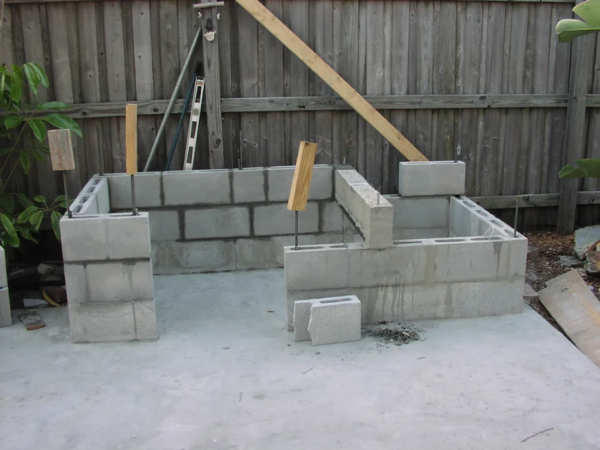
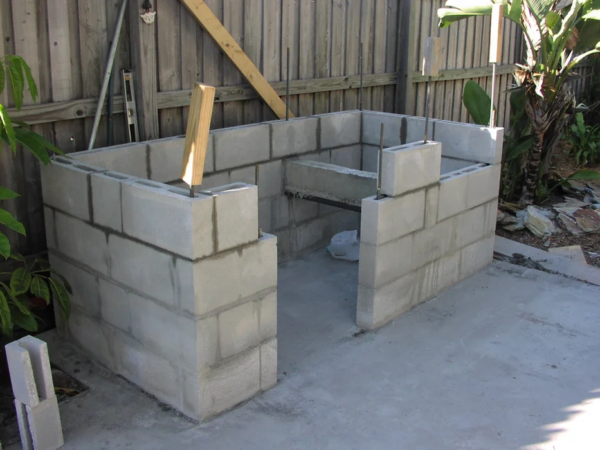
Continue laying additional courses of bricks. Regularly check for level and alignment. Adjust as needed to keep your structure straight and sturdy.
Step 7: Establishing the Smoker Base
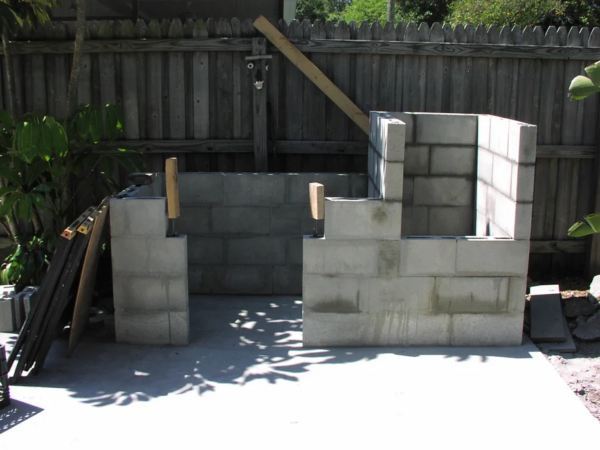
Introduce firebricks into your design where the smoker will be. These specialized bricks will handle the high heat from the smoker and protect your structure.
Structural Enhancements and Detailing
Step 8: Installing the Lintel
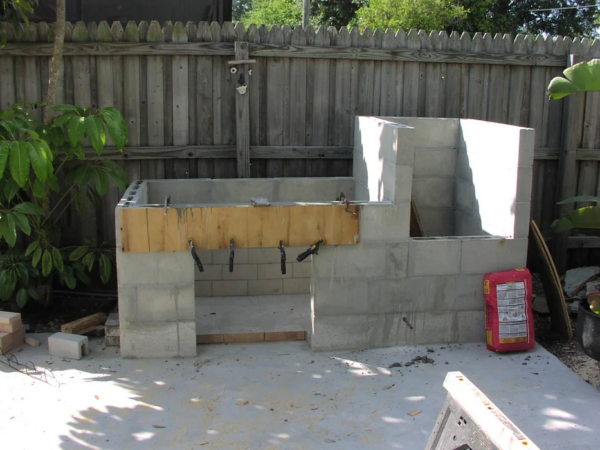
Install a lintel over the fire pit opening to support the bricks above. The lintel will bear the weight of the structure and frame your fire pit entrance.
Step 9: Character with Red Bricks
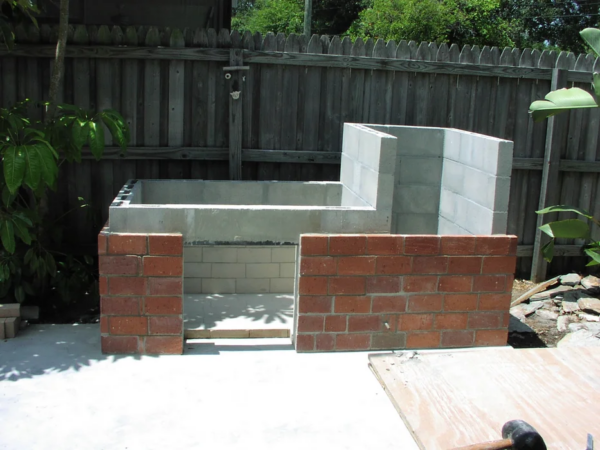
Begin adding courses of red bricks for visual contrast and design flair. Ensure they’re level and follow the same staggered pattern as before for consistency and strength.
Step 10: Embedding Custom Metal Work
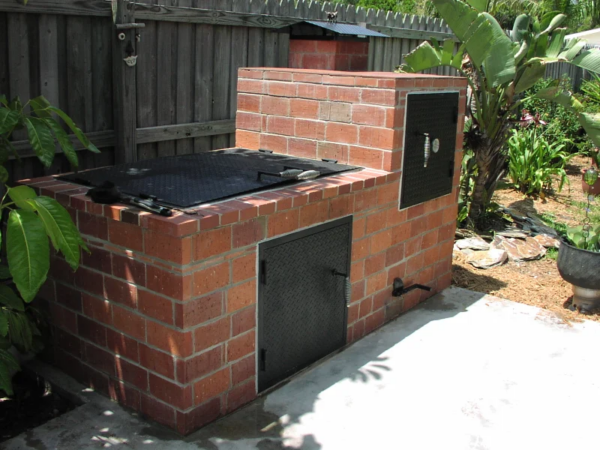


Incorporate custom metal elements such as a grill rack and smoker door. These should be designed to fit snugly within your brick structure.
Step 11: Optimizing Grill Height
To optimize grill height, install a custom system, perhaps utilizing adjustable parts such as car jacks, to raise and lower the grilling surface as needed.
Finishing Touches and Operations
Step 12: Assembling the Smoker Racks
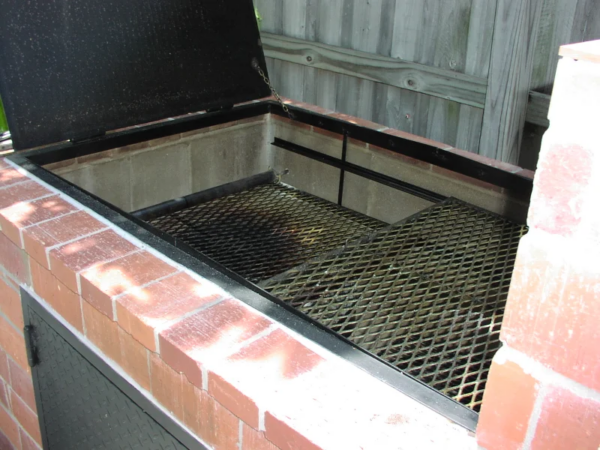
Put your smoker racks in place. If they’re custom-made, ensure they fit precisely within the allotted space, allowing for easy placement and removal.
Step 13: Installing Temperature Control Dampers
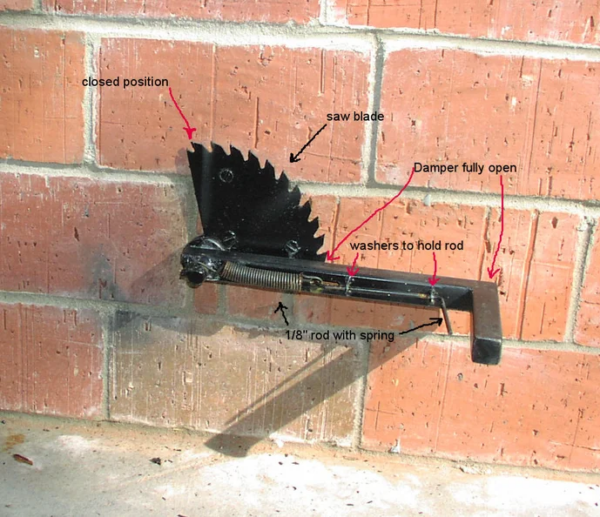

Install intake and exhaust dampers to control the smoker temperature. Proper placement will allow for precise airflow regulation, crucial for smoking meats.
The Inauguration
Step 14: The Initial Ignition
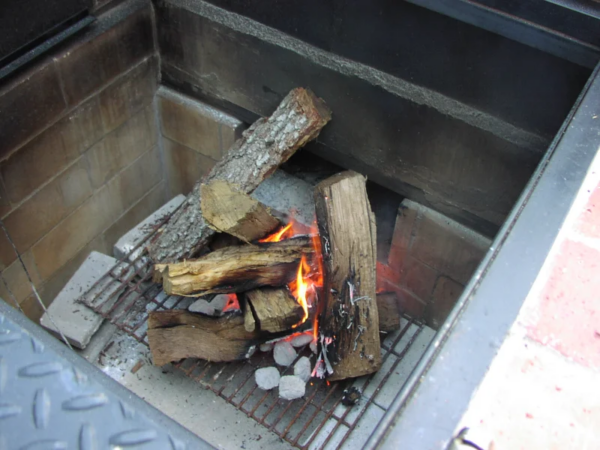
Light your barbecue for the first time to test out your handiwork. This burn-in phase is essential to ensure everything is functioning as expected.
Step 15: The Cooking Begins
Start cooking on your new barbecue. Whether a simple set of burgers or a full brisket, enjoy the fruits of your labor and the enhanced flavor a brick barbecue brings.
Maintenance and Longevity
Step 16: Regular Care
Regularly clean and maintain your barbecue. Proper care will extend its life and ensure it remains a focal point for years to come.
Step 17: Seasonal Checks
Before and after each grilling season, inspect your barbecue for any cracks or damage, making repairs as needed to maintain its structural integrity.
Conclusion
Step 18: Return and Reflect
Regularly return to this guide as you become familiar with the nuances of operating your brick barbecue. Reflect on the process and take pride in constructing not just a cooking device but a gathering place for family and friends.
By adhering to these detailed steps, even first-time builders can craft a stunning and functional centerpiece for their outdoor entertaining space. Embrace the process, enjoy the experience, and revel in the many delicious moments to come with your brick barbecue masterpiece.
Happy Building, and even Happier Grilling!
